웹서버-장고 연동(nginx uWSGI django)
- sudoer 역할 : virtualenv 모듈 설치
- virtualenv 모듈 설치 여부 확인
- sudo apt list | grep venv
- virtualenv 모듈 설치
- sudo apt-get install python3-venv
- virtualenv 모듈 설치 여부 확인
- django 개발자 역할
- wort 계정 로그인 (/home/wort)
- django 작업 폴더 생성 및 이동
- mkdir django
- cd django
- django 가상환경 생성
- python3 -m venv myenv
- django 가상환경 실행
- . ./myenv/bin/activate
- 또는 source ./myenv/bin/activate
- Windows에서는 myenv\Scripts\activate.bat
- python3 가상환경에서 django 연결 테스트
- django 설치 : pip3 install django
- django project 생성 : django-admin startproject mysite
- project 이름 변경 : mv mysite myapp
- db.sqlite3 생성 :
- cd myapp
- python3 manage.py migrate
- mysite/settings.py 수정
- ALLOWED_HOSTS = [‘127.0.0.1’, ‘192.168,0,21’, ‘myhome.kom’, ‘www.myhome.kom’]
- 맨 아래 다음 내용 추가
- import os
- STATIC_ROOT = os.path.join(BASE_DIR, ‘static/’)
- python3 manage.py collectstatic
- django 연결 (작업디렉터리 : /home/wort/django/myapp)
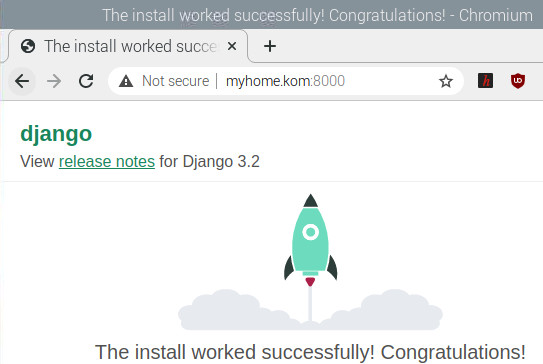
- python3 manage.py runserver 0.0.0.0:8000 : 서버 실행
- 웹브라우저에서 확인

- python3 가상환경에서 uwsgi 연결 테스트
- uwsgi 설치 :
- pip3 install wheel
- pip3 install uwsgi
- web client <-> uWSGI <-> python 연결
- vi /home/wort/django/myapp/test.py
123def application(env, start_response):start_response('200 OK', [('Content-Type','text/html')])return [b"Hello World"] - 실행 : uwsgi –http :8000 –wsgi-file test.py
- 확인 :

- vi /home/wort/django/myapp/test.py
- web client <-> uWSGI <-> django 연결
- cd /home/wort/django/myapp
- 실행 : uwsgi –http :8000 –module mysite.wsgi
- 확인 :
- uwsgi 설치 :
- sudoer 역할 : nginx 설치
- sudo apt-get install nginx
- 웹브라우저를 통해 확인 : http://127.0.0.1
- nginx에 uWSGI 설정 : port 사용
- vi /home/wort/django/myapp/uwsgi_params : 파일 생성
12345678910111213141516uwsgi_param QUERY_STRING $query_string;uwsgi_param REQUEST_METHOD $request_method;uwsgi_param CONTENT_TYPE $content_type;uwsgi_param CONTENT_LENGTH $content_length;uwsgi_param REQUEST_URI $request_uri;uwsgi_param PATH_INFO $document_uri;uwsgi_param DOCUMENT_ROOT $document_root;uwsgi_param SERVER_PROTOCOL $server_protocol;uwsgi_param REQUEST_SCHEME $scheme;uwsgi_param HTTPS $https if_not_empty;uwsgi_param REMOTE_ADDR $remote_addr;uwsgi_param REMOTE_PORT $remote_port;uwsgi_param SERVER_PORT $server_port;uwsgi_param SERVER_NAME $server_name; - sudo vi /etc/nginx/sites-available/uwsgi : nginx에 추가 등록
1234567891011121314151617181920212223upstream django{server 127.0.0.1:8001;}server {listen 8000;server_name 127.0.0.1 #myhome.kom www.myhome.kom;charset utf-8;client_max_body_size 75M;location /media {alias /home/wort/django/myapp/media;}location /static {alias /home/wort/django/myapp/static;}location / {uwsgi_pass django;include /home/wort/django/myapp/uwsgi_params;}} - sudo ln -s /etc/nginx/sites-available/uwsgi /etc/nginx/sites-enabled/
- sudo systemctl restart nginx
- vi /home/wort/django/myapp/uwsgi_params : 파일 생성
- django 개발자 역할
- test.py 실행 확인 : port 사용
- uwsgi 실행 : uwsgi –socket :8001 –wsgi-file test.py
- 실행 결과 확인 : http://127.0.0.1:8000 or http://myhome.kom:8000
- test.py 실행 확인 : port 사용
- sudoer 역할 : nginx에 uWSGI 설정(socket 사용)
- socket을 저장할 폴더 지정
- sudo mkdir /var/www/uwsgi
- sudo chown www-data:www-data /var/www/uwsgi
- 실행을 uid=www-data, gid=www-data 권한으로 실행하니 mysite.sock을 만들 권한이 없는 오류 방지
- sudo chmod 777 /var/www/uwsgi
- 쓰기 권한이 있어야함
- sudo vi /etc/nginx/sites-available/uwsgi : 수정
123456upstream django{server unix:///var/www/uwsgi/mysite.sock;#server 127.0.0.1:8001;}####### 아래는 그대로 ############# - sudo systemctl restart nginx
- socket을 저장할 폴더 지정
- django 개발자 역할 : test.py 실행 확인(socket 사용)
- uwsgi 실행 : uwsgi –socket /var/www/uwsgi/mysite.sock –wsgi-file test.py
- 실행 결과 확인 : http://127.0.0.1:8000 or http://myhome.kom:8000
- 실행 안되는 경우 : cat /var/log/nginx/error.log 에서 오류 찾기
- connect() to unix:///var/www/kom.myhome/myapp/mysite.sock failed (13: Permission denied)
- uwsgi –socket /var/www/uwsgi/mysite.sock –wsgi-file test.py –chmod-socket=666
- 실행 안되는 경우 : cat /var/log/nginx/error.log 에서 오류 찾기
- 실행 결과 확인 : http://127.0.0.1:8000 or http://myhome.kom:8000
- diango 개발자 역할 : .ini 파일 사용
- vi /home/wort/django/myapp/mysite_uwsgi.ini : ini 파일 생성
12345678910111213141516171819202122# mysite_uwsgi.ini file[uwsgi]# Django-related settings# the base directory (full path)chdir = /home/wort/django/myapp# Django's wsgi filemodule = mysite.wsgi# the virtualenv (full path)home = /home/wort/django/myenv# process-related settings# mastermaster = true# maximum number of worker processesprocesses = 10# the socket (use the full path to be safesocket = /var/www/uwsgi/mysite.sock# ... with appropriate permissions - may be neededchmod-socket = 666# clear environment on exitvacuum = true - 실행 : uwsgi –ini mysite_uwsgi.ini
- 실행 결과 확인 : http://127.0.0.1:8000 or http://myhome.kom:8000
- vi /home/wort/django/myapp/mysite_uwsgi.ini : ini 파일 생성
- sudoer 역할 : nginx에 시스템 전역 uWSGI 설정(1회만 설정하면 자동으로 실행됨)
- sudo apt-get install python3-dev python3-pip python3-setuptools
- sudo -H pip3 install –upgrade pip
- sudo -H pip3 install wheel
- sudo -H pip3 install uwsgi
- -H 옵션이 없어도 오류 발생 안함
- 혹시 아래와 같이 경고가 발생하면 -H 옵션을 붙이길
- The directory ‘/home/pincoin/.cache/pip/http’ or its parent directory is not owned by the current user and the cache has been disabled. Please check the permissions and owner of that directory. If executing pip with sudo, you may want sudo’s -H flag.
- 혹시 아래와 같이 경고가 발생하면 -H 옵션을 붙이길
- sudo mkdir -p /etc/uwsgi/vassals
- sudo ln -s /home/wort/django/myapp/mysite_uwsgi.ini /etc/uwsgi/vassals/
- sudo uwsgi –emperor /etc/uwsgi/vassals –uid www-data –gid www-data
- 실행을 uid=www-data, gid=www-data 권한으로 실행하니 myapp 디렉터리에 mysite.sock를 만들 권한이 없는 오류 발생
- 해결 : myapp 폴더의 owner을 www-data:www-data로 변경했음
- 실행 결과 확인 : http://127.0.0.1:8000 or http://myhome.kom:8000
- 서비스 등록 스크립트 생성
- sudo vim /etc/systemd/system/uwsgi.service
12345678910111213[Unit]Description=uWSGI Emperor service[Service]ExecStart=/usr/local/bin/uwsgi --emperor /etc/uwsgi/vassalsRestart=on-failureKillSignal=SIGQUITType=notifyNotifyAccess=allStandardError=syslog[Install]WantedBy=multi-user.target - uWSGI 서비스 등록
- sudo systemctl start uwsgi
- sudo systemctl enable uwsgi
- uWSGI 구동 확인
- sudo systemctl status uwsgi
- 파이썬 소스 코드 수정하면 uWSGI 재실행
- sudo systemctl restart uwsgi
- sudo vim /etc/systemd/system/uwsgi.service
- sudoer 역할 :
- 수정 파일
- mysite/settings.py
- /etc/nginx/sites-available/uwsgi_wort1
- /home/wort1/django/myapp/wort1_uwsgi.ini
- 재실행
- sudo systemctl restart uwsgi
- sudo systemctl restart nginx <– 필요에 따라
- 수정 파일
- wort1 계정 추가
- wort 계정 로그인 (/home/wort)
- django 작업 폴더 생성 및 이동
- mkdir django
- cd django
- django 가상환경 생성
- python3 -m venv myenv
- django 가상환경 실행
- . ./myenv/bin/activate
- 또는 source ./myenv/bin/activate
- Windows에서는 myenv\Scripts\activate.bat
- python3 가상환경에서 django 연결 테스트
- django 설치 : pip3 install django
- django project 생성 : django-admin startproject mysite
- project 이름 변경 : mv mysite myapp
- db.sqlite3 생성 :
- cd myapp
- python3 manage.py migrate
- mysite/settings.py 수정
- ALLOWED_HOSTS = [‘127.0.0.1’, ‘192.168,0,21’, ‘wort1.moak.co.kr‘,’ myhome.kom’, ‘www.myhome.kom’]
- 맨 아래 다음 내용 추가
- import os
- STATIC_ROOT = os.path.join(BASE_DIR, ‘static/’)
- python3 manage.py collectstatic
- django 연결 (작업디렉터리 : /home/wort1/django/myapp)
- python3 manage.py runserver 0.0.0.0:8800 : 서버 실행
- 웹브라우저에서 확인
- python3 가상환경에서 uwsgi 연결 테스트
- uwsgi 설치 :
- pip3 install wheel
- pip3 install uwsgi
- web client <-> uWSGI <-> python 연결
- vi /home/wort/django/myapp/test.py
123def application(env, start_response):start_response('200 OK', [('Content-Type','text/html')])return [b"Hello World"] - 실행 : uwsgi –http :8800 –wsgi-file test.py
- 확인 :
- vi /home/wort/django/myapp/test.py
- web client <-> uWSGI <-> django 연결
- cd /home/wort/django/myapp
- 실행 : uwsgi –http :8800 –module mysite.wsgi
- 확인 :
- uwsgi 설치 :
- sudoer 역할 : nginx에 uWSGI 설정
- vi /home/wort/django/myapp/uwsgi_params : 파일 생성
12345678910111213141516uwsgi_param QUERY_STRING $query_string;uwsgi_param REQUEST_METHOD $request_method;uwsgi_param CONTENT_TYPE $content_type;uwsgi_param CONTENT_LENGTH $content_length;uwsgi_param REQUEST_URI $request_uri;uwsgi_param PATH_INFO $document_uri;uwsgi_param DOCUMENT_ROOT $document_root;uwsgi_param SERVER_PROTOCOL $server_protocol;uwsgi_param REQUEST_SCHEME $scheme;uwsgi_param HTTPS $https if_not_empty;uwsgi_param REMOTE_ADDR $remote_addr;uwsgi_param REMOTE_PORT $remote_port;uwsgi_param SERVER_PORT $server_port;uwsgi_param SERVER_NAME $server_name; - sudo vi /etc/nginx/sites-available/uwsgi_wort1 : nginx에 추가 등록
123456789101112131415161718192021222324upstream django_wort1{server unix:///var/www/uwsgi/mysite_wort1.sock;#server 127.0.0.1:8001;}server {listen 8800;server_name 127.0.0.1 #myhome.kom www.myhome.kom;charset utf-8;client_max_body_size 75M;location /media {alias /home/wort1/django/myapp/media;}location /static {alias /home/wort1/django/myapp/static;}location / {uwsgi_pass django_wort1;include /home/wort1/django/myapp/uwsgi_params;}} - sudo ln -s /etc/nginx/sites-available/uwsgi_wort1 /etc/nginx/sites-enabled/
- sudo systemctl restart nginx
- vi /home/wort/django/myapp/uwsgi_params : 파일 생성
- django 개발자 역할 : test.py 실행 확인(socket 사용)
- uwsgi –socket /var/www/uwsgi/mysite_wort1.sock –wsgi-file test.py –chmod-socket=666
- 실행 결과 확인 : http://127.0.0.1:8000 or http://myhome.kom:8000
- diango 개발자 역할( .ini 파일 생성) : vi /home/wort1/django/myapp/wort1_uwsgi.ini
12345678910111213141516171819202122# mysite_uwsgi.ini file[uwsgi]# Django-related settings# the base directory (full path)chdir = /home/wort1/django/myapp# Django's wsgi filemodule = mysite.wsgi# the virtualenv (full path)home = /home/wort1/django/myenv# process-related settings# mastermaster = true# maximum number of worker processesprocesses = 10# the socket (use the full path to be safesocket = /var/www/uwsgi/mysite_wort1.sock# ... with appropriate permissions - may be neededchmod-socket = 666# clear environment on exitvacuum = true - 실행 : uwsgi –ini wort1_uwsgi.ini
- 실행 결과 확인 : http://127.0.0.1:8000 or http://myhome.kom:8000
- sudoer 역할
- sudo ln -s /home/wort1/django/myapp/wort1_uwsgi.ini /etc/uwsgi/vassals/
- sudo uwsgi –emperor /etc/uwsgi/vassals –uid www-data –gid www-data
- 실행을 uid=www-data, gid=www-data 권한으로 실행하니 myapp 디렉터리에 mysite.sock를 만들 권한이 없는 오류 발생
- 해결 : myapp 폴더의 owner을 www-data:www-data로 변경했음
- 실행 결과 확인 : http://127.0.0.1:8000 or http://myhome.kom:8000
- uWSGI 서비스 재실행
- sudo systemctl restart uwsgi
- wort9 계정 추가
- wort1 계정의 django 폴더 복사, chown을 사용하여 오너 변경
- mysite/settings.py 수정
- ALLOWED_HOSTS = [‘127.0.0.1’, ‘192.168,0,21’, ‘wort9.moak.co.kr‘]
- sudoer 역할 : nginx에 uWSGI 설정
- sudo vi /etc/nginx/sites-available/uwsgi_wort9 : nginx에 추가 등록
123456789101112131415161718192021222324upstream django_wort9{server unix:///var/www/uwsgi/mysite_wort9.sock;#server 127.0.0.1:8001;}server {listen 8800;server_name wort9.moak.co.kr;charset utf-8;client_max_body_size 75M;location /media {alias /home/wort9/django/myapp/media;}location /static {alias /home/wort9/django/myapp/static;}location / {uwsgi_pass django_wort9;include /home/wort9/django/myapp/uwsgi_params;}} - sudo ln -s /etc/nginx/sites-available/uwsgi_wort9 /etc/nginx/sites-enabled/
- sudo systemctl restart nginx
- sudo vi /etc/nginx/sites-available/uwsgi_wort9 : nginx에 추가 등록
- diango 개발자 역할 : .ini 파일 사용
- vi /home/wort1/django/myapp/wort9_uwsgi.ini : ini 파일 생성
12345678910111213141516171819202122# mysite_uwsgi.ini file[uwsgi]# Django-related settings# the base directory (full path)chdir = /home/wort9/django/myapp# Django's wsgi filemodule = mysite.wsgi# the virtualenv (full path)home = /home/wort9/django/myenv# process-related settings# mastermaster = true# maximum number of worker processesprocesses = 10# the socket (use the full path to be safesocket = /var/www/uwsg9/mysite_wort9.sock# ... with appropriate permissions - may be neededchmod-socket = 666# clear environment on exitvacuum = true
- vi /home/wort1/django/myapp/wort9_uwsgi.ini : ini 파일 생성
- sudoer 역할
- sudo ln -s /home/wort9/django/myapp/wort9_uwsgi.ini /etc/uwsgi/vassals/
- uWSGI 서비스 재실행
- sudo systemctl restart uwsgi
- sudo systemctl restart nginx